
How Dado Can Help You Support Your CRG's/ERG's
Community Resource Groups (CRG)/Employee Resource Groups (ERG) are a great way to help improve and support inclusion within your organization. Dado helps ensure that every new employee can join these groups and feel included from day one.
1. Add a custom Dado field to store CRG/ERG membership
Add a custom Dado field for your groups. Enter a Name (we've used CRG), choose a Data Type (we've used Text), and select Add.

For more information, visit our article on Adding Custom Fields with Extra User Data.
2. Add a "Select Option' subtask with a list of CRG'S

- Create a Task.
- Add a Select Option Subtask to the Task. In the Subtask settings, enter a Question, for example "What CRGs would you like to join?"
- Make sure Allow multiple answers is switched on.
- Add each CRG/ERG in your organization as an option. Type an option and press Enter to confirm.
- Under Data Destinations, select Add Destination to link the Subtask to your CRG field. In Save in, choose Dado, then choose your CRG field in Dado Data Field.
- Finalize any additional changes to the text, etc.
- Select Add Task (or Save Task if you're editing an existing Task).
3. Create an automation adding them to any desired events, Slack channels, or Google group
Add the actions you need, for example Google Calendar - Invite to event or Slack - Invite to channel, then select Add Automation.

For more information, visit our article on creating automations for Google Calendar, Slack, or Google Groups.
4. Set up a target audience for each CRG, using the data field we set up previously
Segments (also known as Target Audiences) let each CRG's Automations go only to the people who joined that group. In the Automation window, open the Audience & Completion tab, then:
- Under Segments & Completion, select Create new segment (or Copy saved segment to reuse one you've already created and saved).
- Name the segment after the CRG, for example "Parents".
-
Under Participant Filters, choose your CRG field, select contains any of, and enter the option exactly as it appears in your Select Option subtask, for example "Parents".
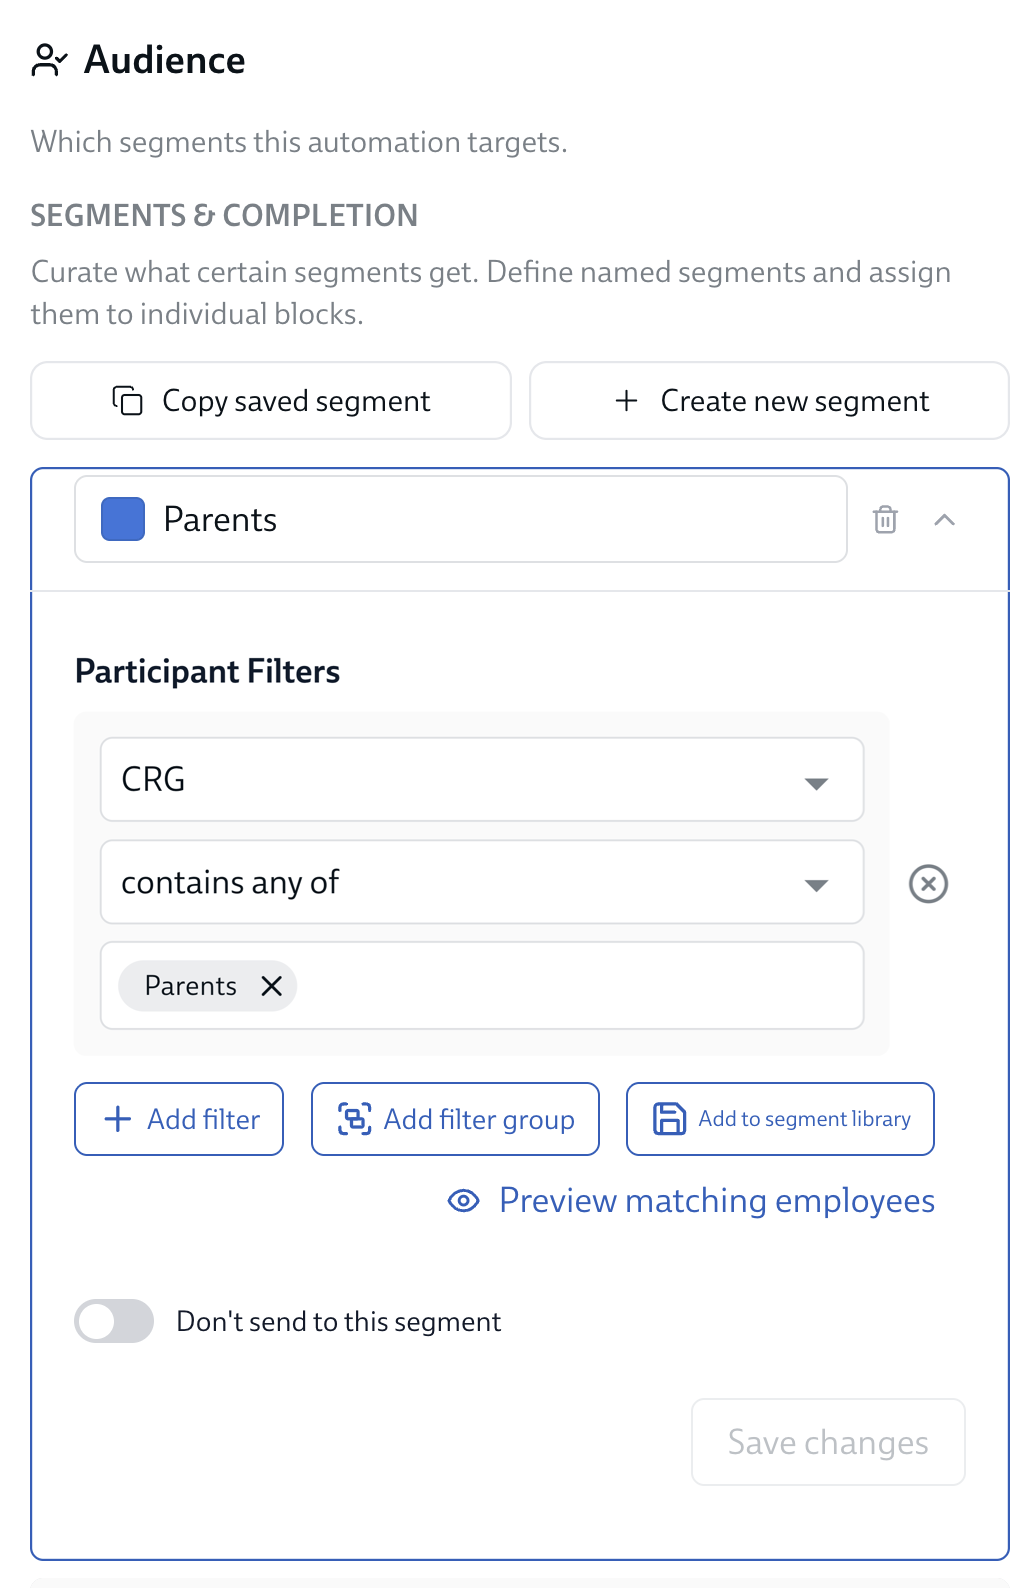
- Optionally, select Preview matching employees to check who matches, or Add to segment library to save the segment for reuse.
- Select Save changes at the bottom of the left hand column to save your segment.
-
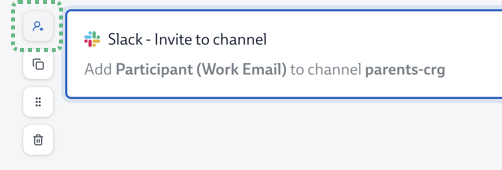
Now assign the relevant actions to this segment. Click on the All Blocks tab in the center column. Hover over each actions and click on the segment settings
-
For each automation that should trigger for this segment, ensure that segment is selected
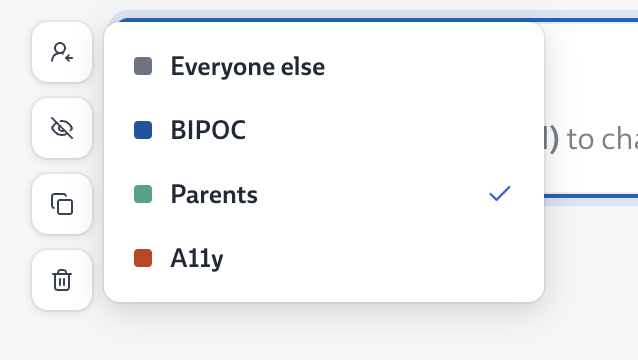
- For each automation that should not trigger for this segment, ensure that segment is not selected
-
Repeat for each CRG. Each segment appears as a tab above the Automation's actions.
For more information, visit our article on setting up target audiences.