
Sending data about Participants to a Google/Excel Online Sheet, as soon as they start an Experience or at a specific point in the Experience
Dado allows you to set up any Subtask to send the data it collects from Participants to a Google or Excel Online Sheet. (Find out more in How to set up a Subtask to send data to a Google or Excel Online Sheet.) But it's also possible to have Participant data sent to a Google/Excel Sheet as soon as Participants start the Experience.
This can be useful in different circumstances:
- The Office Managers want to know every new hire's name, working location and start date, as early as possible, so they can prepare accordingly
- The IT team wants a running list of terms, but only wants exiting employees' data one week before their last day
To support these kinds of use cases, Dado can send info on enrolleses to a dedicated Google/Excel Sheet, either as soon as they start your onboarding Experience, or at a specific point later in the experience.
How to sync data about the Participant, as soon as they enroll in an experience, or at any other point in that experience
The video references Google Sheets, but the exact same process will work for Excel Online Sheets.
- Start by making a list of which information about Participants you wish to send to your Google/Excel Sheet. Dado can sync any data on a Participant's user profile.
- It's also possible to send data from Subtasks – find out more in our help article on sending data from a subtask to a data destination
-
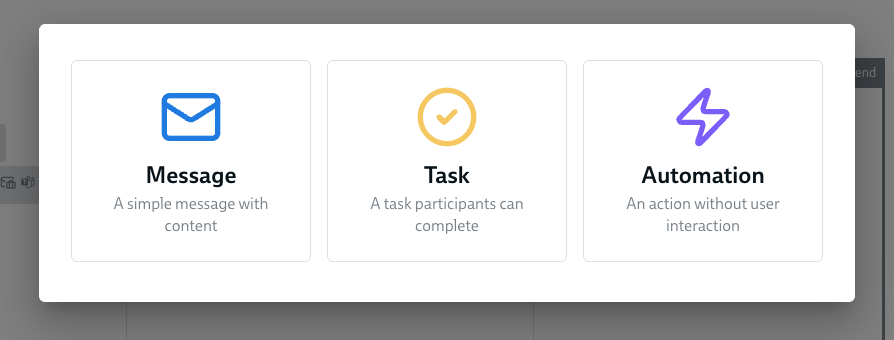
Go into edit mode on your Experience and click anywhere on the Timeline. Select Automation in the dialog that appears.
-
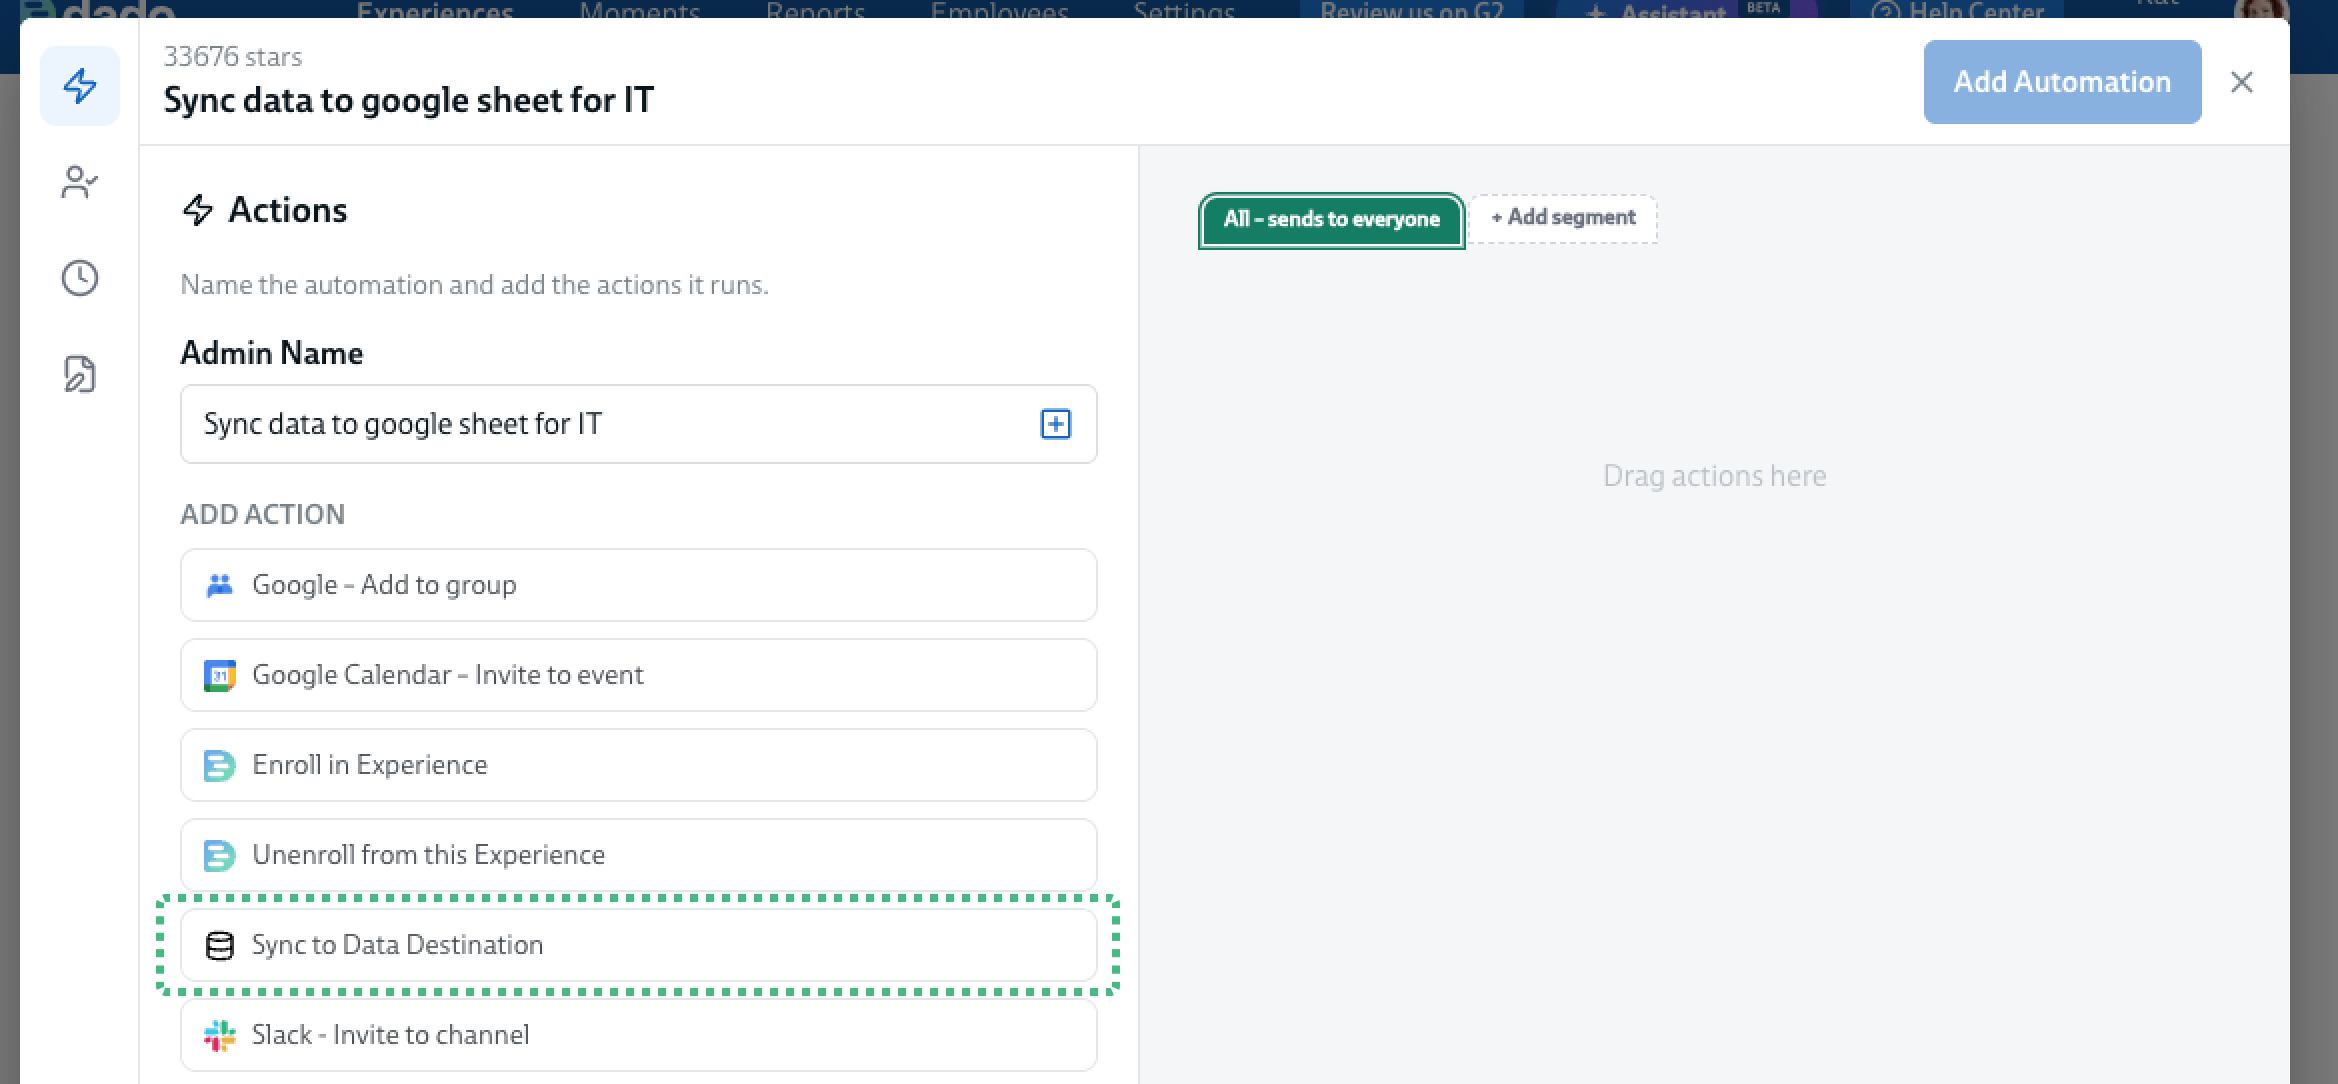
Click on the Sync to Data Destination action in the left hand column
-
In the left hand column, start by selecting the system you want to send data to, in the first dropdown. In the screenshot below, Google Sheet is selected, but the same process works for Excel.
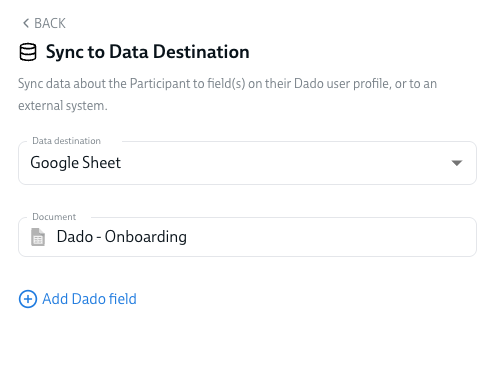
- In the second dropdown, select which specific spreadsheet you want to send data to
-
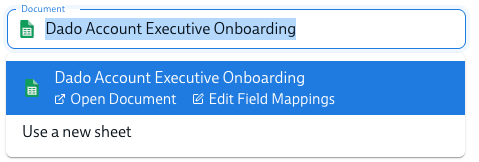
If your experience is already sending data to any Google or Excel Online spreadsheets, you'll see these listed in the dropdown. You can either select an existing sheet or click Use a new sheet
-
If your experience isn't yet set up to send any data to Google/Excel Online spreadsheets, you'll be invited to create a sheet. You will be able to change the name of this sheet after creation.
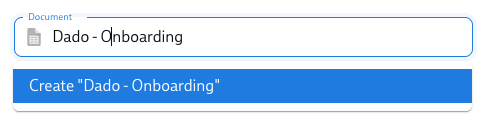
-
If you would like Dado to sync data to an existing sheet that you've created, please continue to follow these instructions to set up the sync, and then email the Dado helpdesk to request that the sheet created by Dado be swapped for your existing sheet.
You'll need to send the helpdesk:
- the name and link of your Experience
- the name of the sheet that you set up via Dado
- the url of the sheet you'd like Dado to sync data to instead
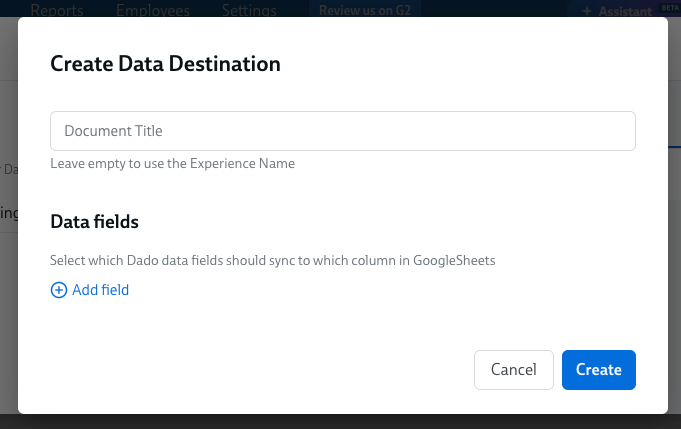
- If you choose to create a new sheet, you'll be show a screen where you can name the new sheet that Dado will create
- You do not need to add any fields in this new window, in the section titled Data fields
-
Once you've entered in your name, click Create and you'll return to the previous screen.
-
Now it's time to specify what data you want synced to the sheet. Click Add Dado field in the left hand column.
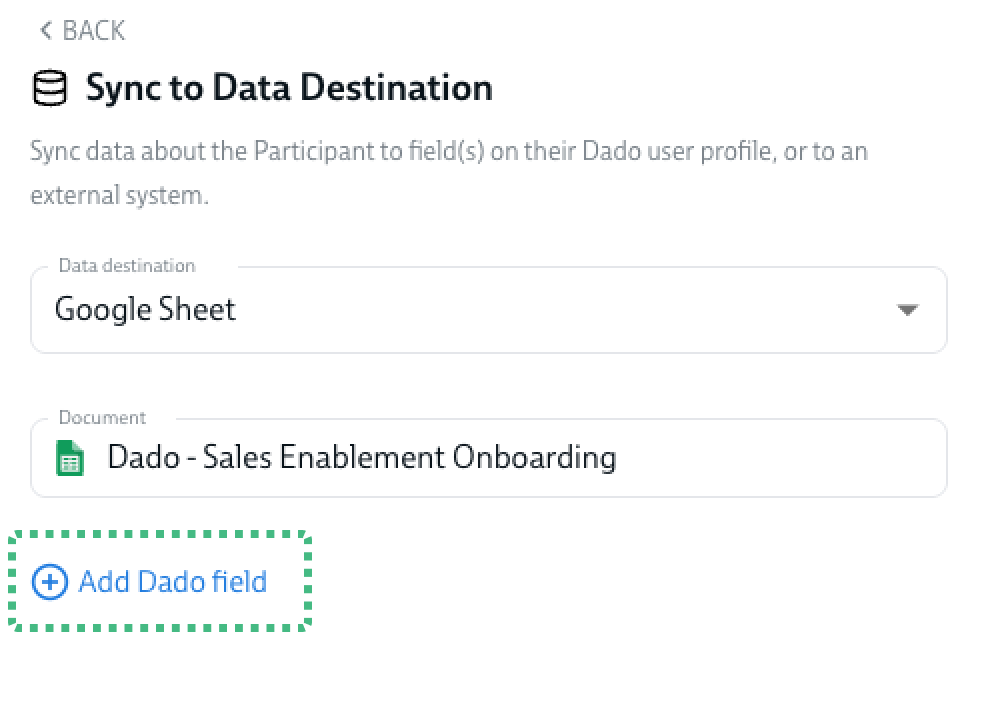
- A pair of fields will appear
- In the first field, select the Dado field you want synced to the sheet. As reminder: this is data about the Participant.
-
In the second field, type in the column name in the Google/Excel Online sheet where you want this data sent.
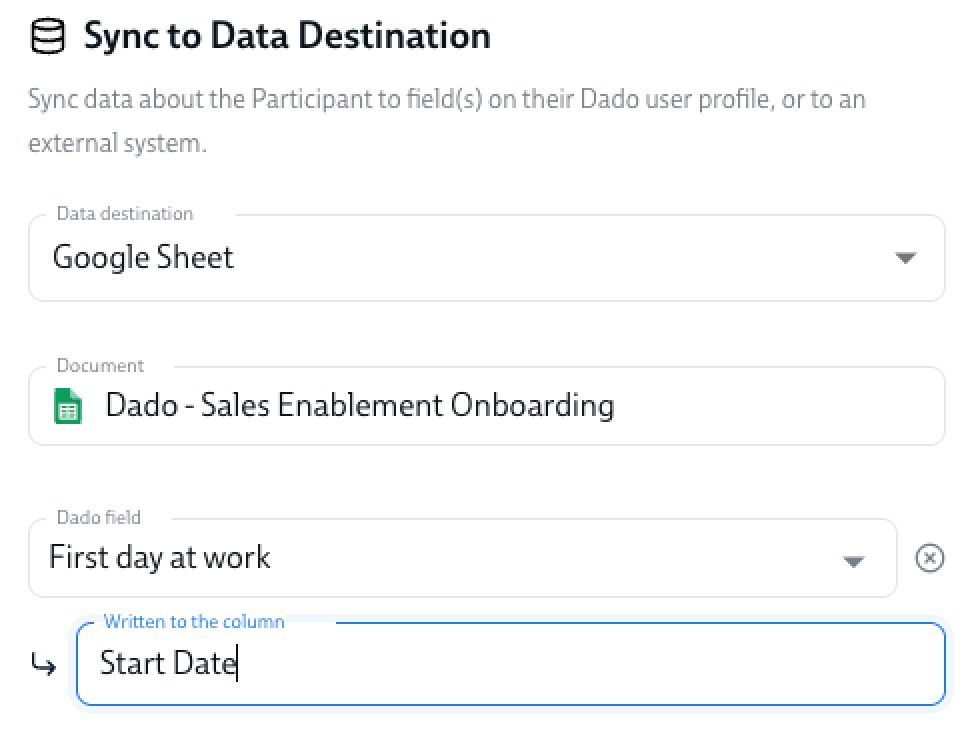
- Continue adding in all the fields you want synced to your sheet.
-
The final step is to specify when this data sync should occur. To set the trigger for the data sync, click on the clock icon in the left hand navigation, to open the Timing and Triggers settings
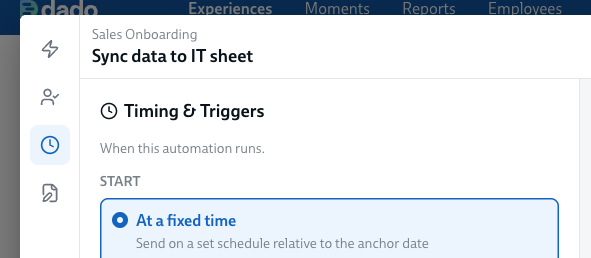
- In this section, you can choose from multiple options. here are the ones most relevant for this use case:
- At a fixed time: specify a fixed date in the experience, eg on the first day of the experience, or 7 days before last day at work.
- When conditions met: define a rule that will determine when this triggers. For instance, when the shipping address and laptop selection fields are no longer blank.
- After a task is completed: this is most likely not relevant, since you can specify that specific subtasks sync to a Google/Excel online sheet. However, there are some circumstances, eg triggering a sync to the sheet used by IT only once the Manager has approved the new hire's hardware selections.
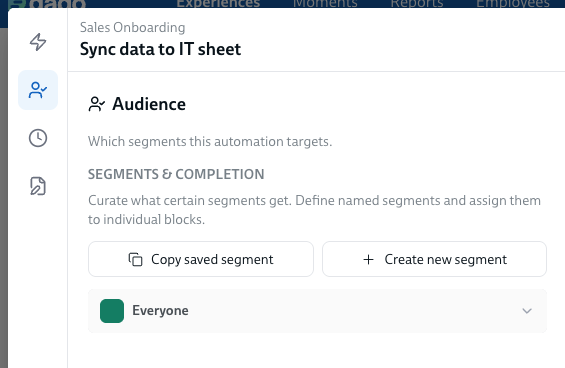
- If you want this data synced only for a subset of the people enrolled in the experience you can click on the Audience icon to set up a segment.
-
See our article on How to target and personalize timeline items
-
-
When you've set your trigger, click back to the Content section and give you new automation a name.
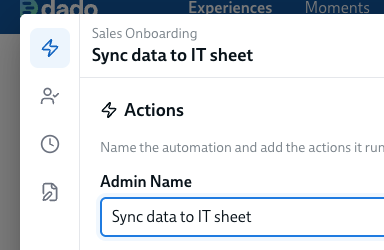
- Finally, save your automation by clicking Save in the top right, then save the changes to your Experience by clicking the Save changes link in the bottom right of the screen.
- After you've saved, Dado will create a new sheet (if that's what you've selected) or add new columns to an existing sheet.
Getting access to Data Destination Google/Excel Online sheets created by Dado
By default, Dado will create a new Excel/Google sheet for each Data Destination you set up. This sheet will be owned by your Google Integration User/Microsoft Integration User (the account used to set up the Google or Microsoft integration).
To get access to any sheet:
- Go to the view mode of your Experience
-
Find the sheet in the Resources section at the top, and click the cog icon next to its name
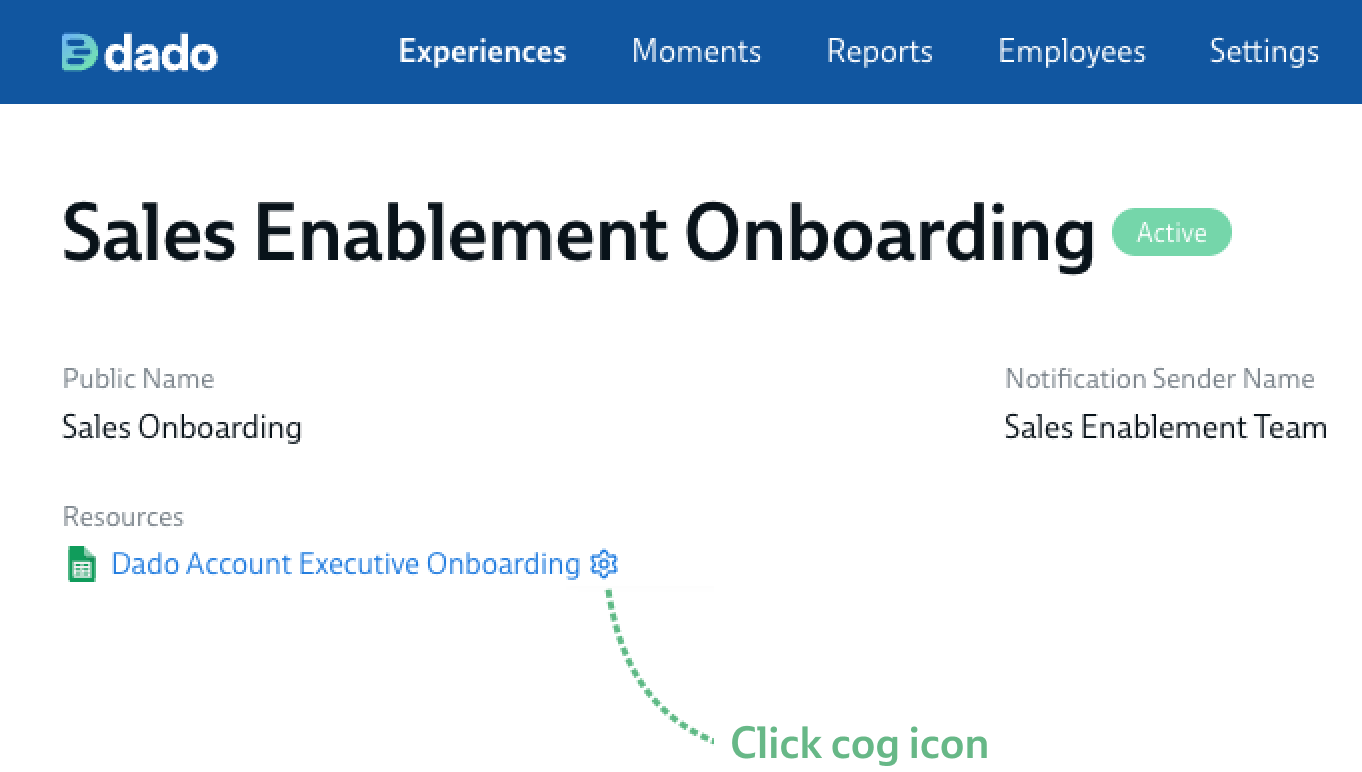
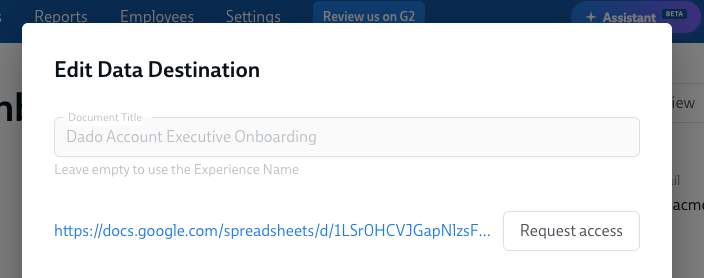
- The settings for this Data Destination will open in a dialog. Click the Request Access button
-
Dado will be able grant access to anyone who has access to the Experience – unless additional access protections have been placed on that sheet
-
