
Automations: Sync to Data Destination
Contents
- Pre-requisite for setting up Send to Data Destination Automations
- How to prevent duplicate users being created in Dado
There are three ways in Dado to sync user data to a Google Sheet or Excel Online spreadsheet:
- When a user is enrolled in an experience
- When a sub-task is completed
- Through an automation
This article focuses on setting up data sync through an automation.
How to set up a an automation to send data to a Google or Excel Online Sheet
Pre-requisite for setting up Sync to Data Destination Automations
Google Workspace or Microsoft integration with all required scopes
To use Calendar Actions in Automations, you need to have connected either your Google Workspace or Microsoft account, including granting all the requested scopes. For more information on these integrations, check out the set-up instructions for Microsoft or Google Workplace.
Sync to Data Destination Action
The "Sync to Data Destination" automation writes data from Dado fields directly to Google Sheets or Excel.
You can set Sync to Data Destination automations to send all data for that Experience to a single Google or Excel Online Sheet, or set up separate, dedicated Sheets for specific colleagues or departments. For instance, you could create a Sheet that provides your IT team with the information they need to order hardware for new hires and ship it to the right address.
Here's how to set this up:
- Go to the edit mode of your Experience and open the Timeline.
- Click on an empty space in the timeline and select '"Automation".
- Click Sync to Data Destination in the list of automations.
- In the "data destination" dropdown, select either "Google Sheet" or "Microsoft Excel", depending on your organization
- In the second ("Document") dropdown, either select a Google/Excel Sheet that already exists in this experience; or "Use a new sheet".
- If you select "Use a new sheet", a new window will appear. In this window you can select which existing Dado fields you would like to appear in this new spreadsheet (alongside the data from this automation).
-
Click Add Dado field below to select the fields you want to sync and assign a column header for each (for example, "Department").
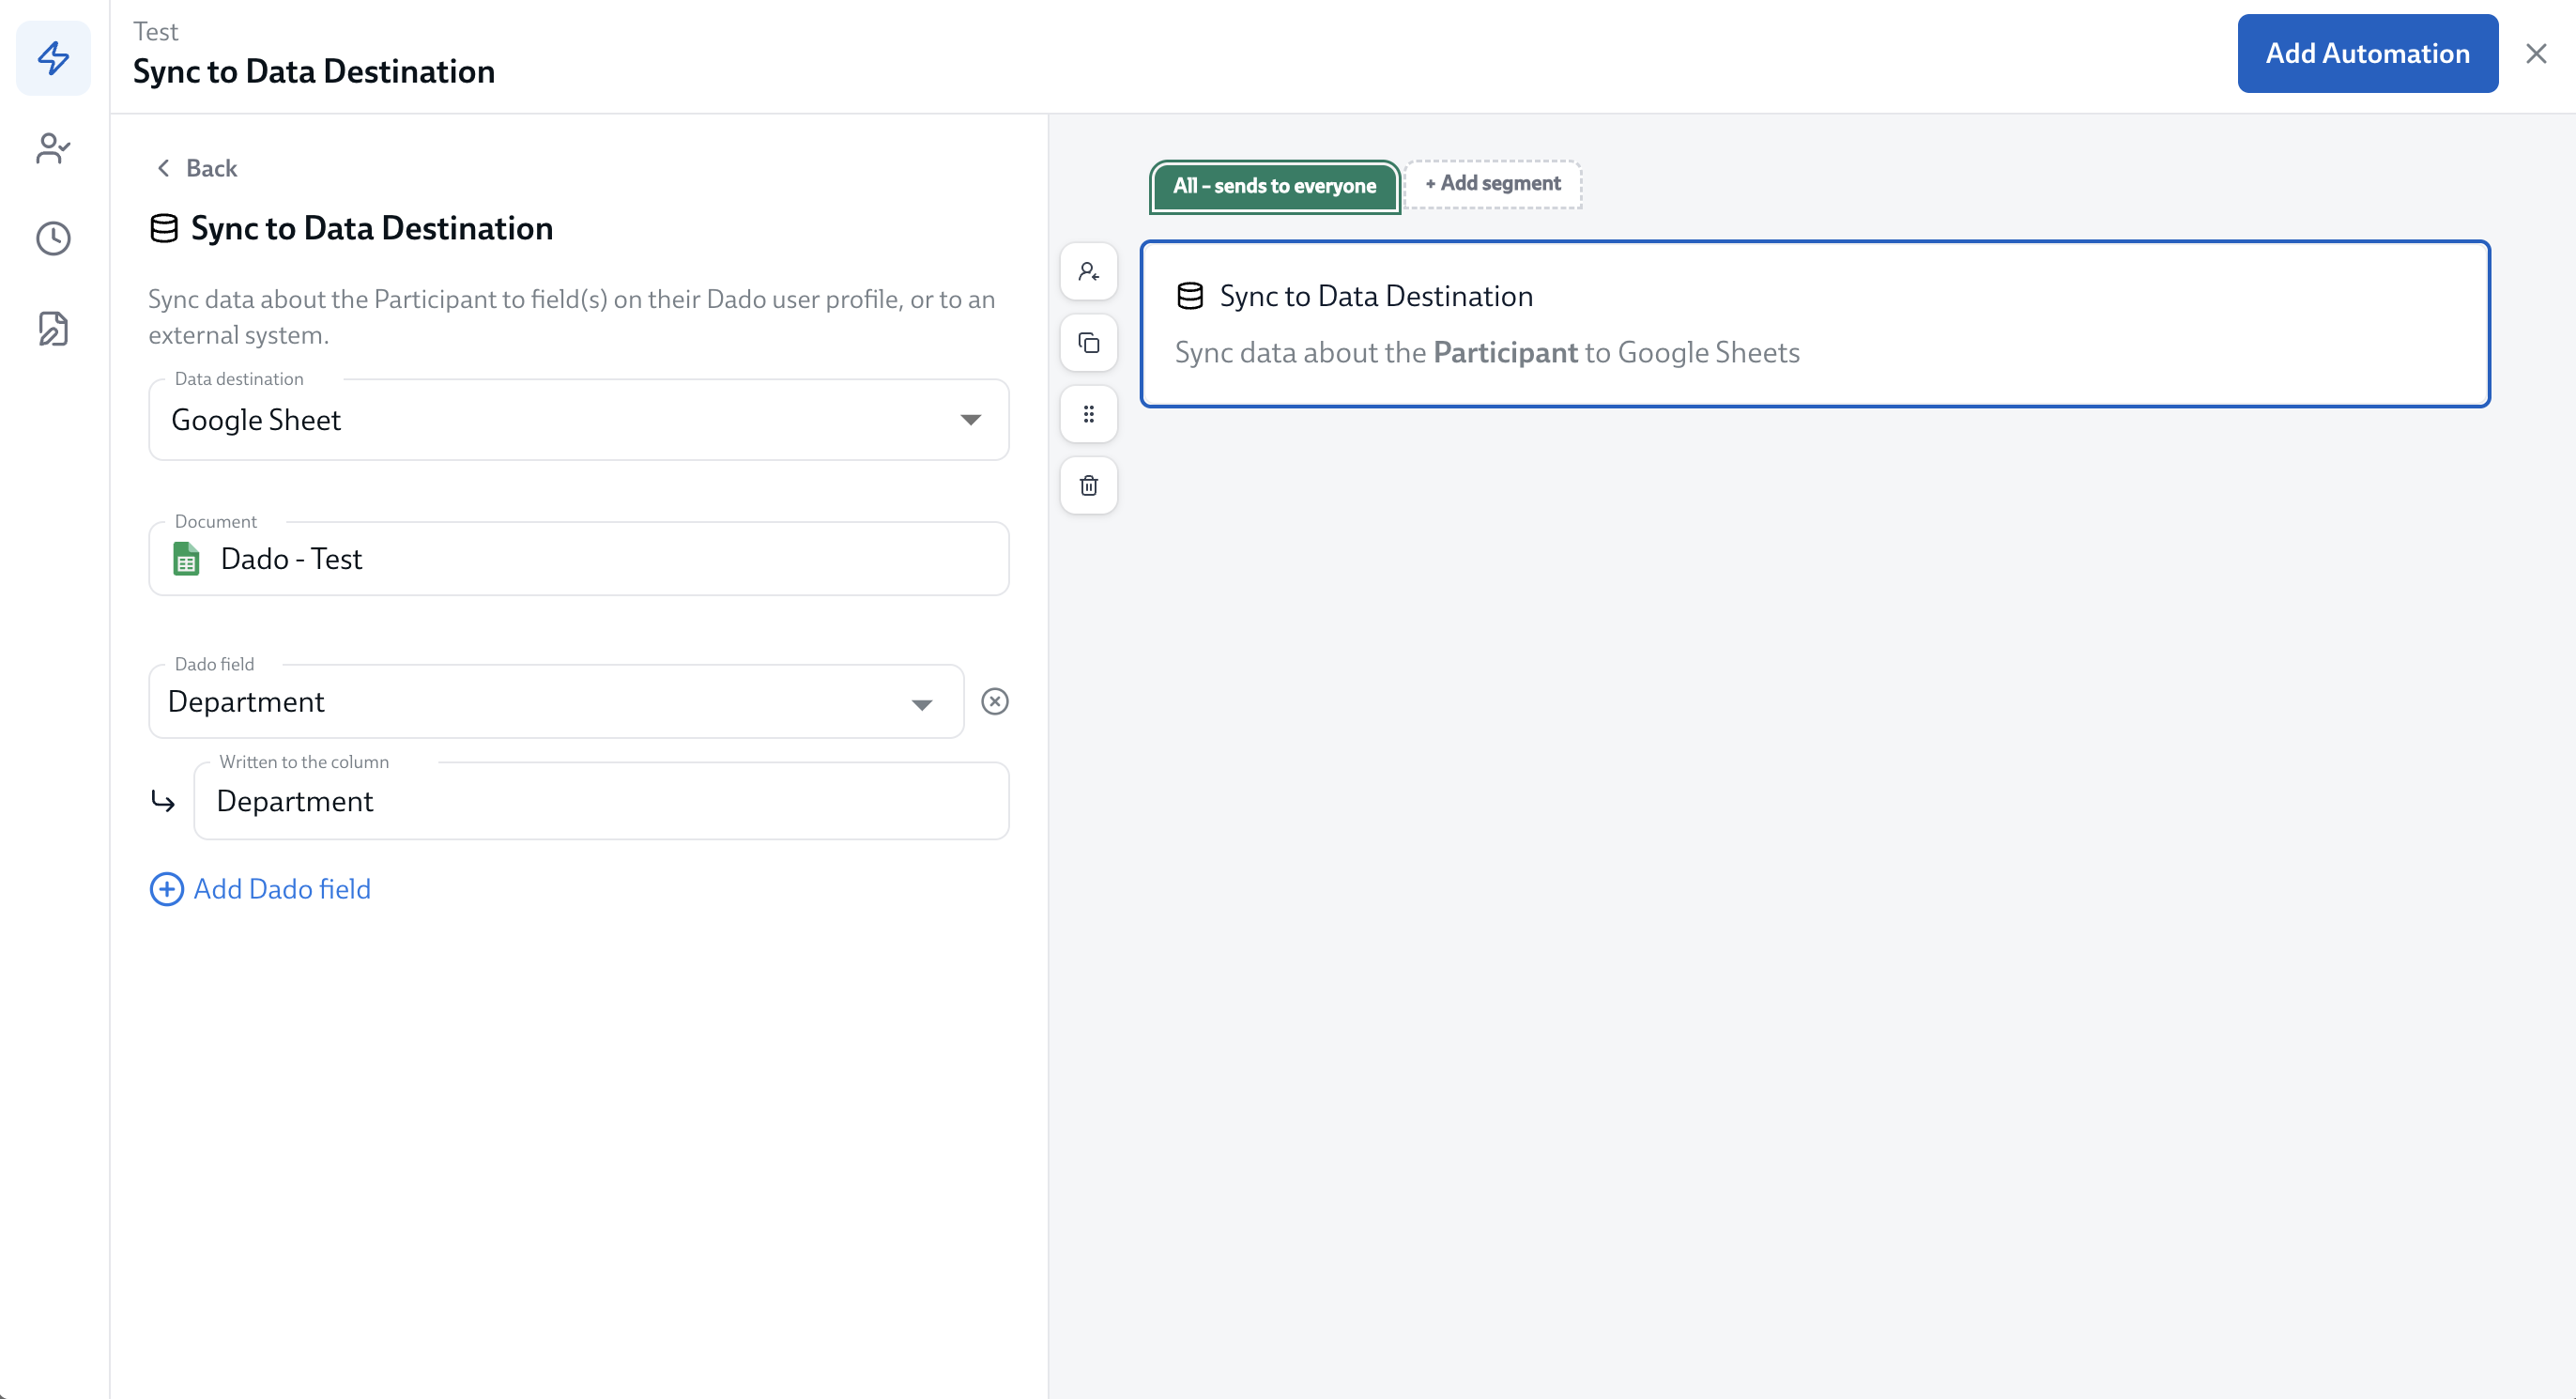
- Continue adding Dado fields to the automation as needed.
- Click "Add automation" to add the automation you have just set up.
-
Don' forget to hit "save on the timeline".
Like any automation, you can control who it runs for using segments (target audiences) and when it runs using the five options below:
- Fixed day: Runs on a specific day of the experience.
- When another task is completed: Fires after a user finishes a prerequisite task.
- When a data field changes: Executes whenever a selected data field updates.
- When milestone date changes: Triggers if a key date milestone shifts.
- When the following conditions are met: Runs as soon as specific criteria are satisfied.
For more information on different ways to trigger a Task/Message/Automation visit this help article.
By default, Dado will create a new Excel/Google sheet the first time you set up an automation. This sheet will be owned by your Google Integration User/Microsoft Integration User (the account used to set up the Google or Microsoft integration)
If you would like Dado to create a new sheet, just select "Use a new sheet" in the document drop-down.
If you would like Dado to sync data to a sheet that already exists and that was not created by Dado, the Dado help team can set this up for you. To do this, please:
- Ensure that your Google/Microsoft Integration User has edit access to the existing sheet you'd like data to be synced to
- Set up the automation as described above
- Provide the Dado help team with the URL of your existing sheet, and ask them to update the data destination