
Docebo Integration
Contents
- What can you do with a Dado-Docebo integration?
- What data is exchanged between Dado and Docebo?
- How to set up the Docebo integration
What can you do with a Dado <> Docebo integration?
The Dado <> Docebo integration allows you to automatically enroll employees into Docebo courses and track completion.
What data is exchanged between Dado and Docebo?
Docebo data accessible to Dado
Dado connects to Docebo via a combination of OAuth and webhooks.
For the OAuth integration, we recommend you set up a dedicated Docebo account for Dado to use, which enables you to use Docebo's permissions to restrict Dado's access. Dado's Docebo account will need to be a Power User, able to access all the users you'd want Dado to enroll, and all the courses you'd want it to enroll those users into.
Power User Resources
- Users: All, or the subsection of the organization you'd want Dado to be able to enroll in courses
- Courses: only the courses you want Dado to be able to enroll people into
To be able to track completion, Dado needs access to the Webhook events listed below. If you grant all of these, Dado will be able to see the users you specify, and which users are enrolled in the courses you specify, as well as their completion status in those courses.
Webhook Events
- Learner completed course
- User level has been changed in a course
- Learner completed learning plan
- Assignment has been submitted
Dado data accessible to Docebo
When automating the enrollment of users in Docebo, Dado sends the email address of those users to Docebo. No additional user data is synced from Dado to Docebo beyond the user's email address and a request to enroll them in the courses you specify.
How to set up the Docebo Integration
Time required: 20 minutes
Pre-requisites: a Docebo account with Superadmin permissions
Step 1: Create a Docebo Power User for Dado to use
We strongly recommend that you create a dedicated Docebo Poweruser account for Dado, to insure security and continuity of access.
A dedicated account enables you to precisely control which courses and users in Docebo are accessible to Dado.
In addition, a dedicated account ensures that Dado does not lose access if the team member who set up the OAuth leaves the organization or transitions into a different role.
- In the People menu in Docebo, Click the New users/branch button, then click New user
- In the sidebar, fill out the following fields:
- Username: Dado account
- Level: Power user
- You do not need to add an Email, First name or Last name
- Make a note of the username and password – you'll need them in a future step
- Leave the toggle selected for Activate user at the end of the creation process
-
Deselect the toggle for Send User has been created notification to new user
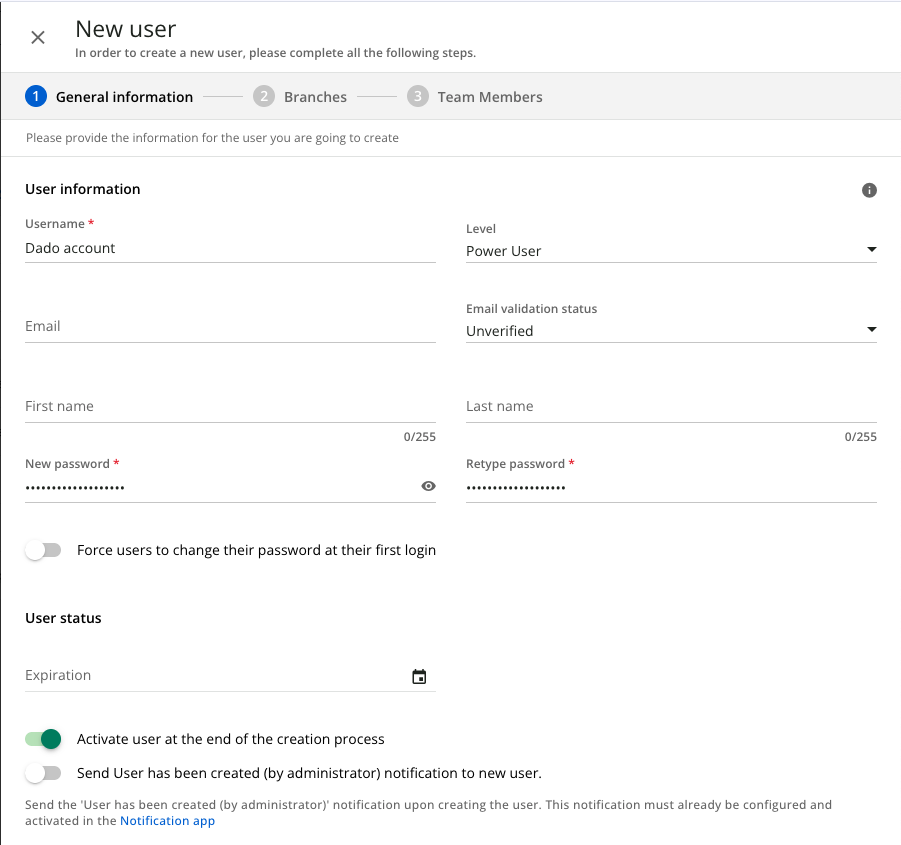
- Click the Next button to move forward to the Branches step. Add the user to any branches that are relevant for your organization, then click Next.
- You do not need to add a Direct Manager or team members in the next step, so click Create user.
-
Now select Power Users in the left hand navigation, and find the Dado account user you've just created in the table. Click the ... menu on the right hand side of the table row, and select Edit
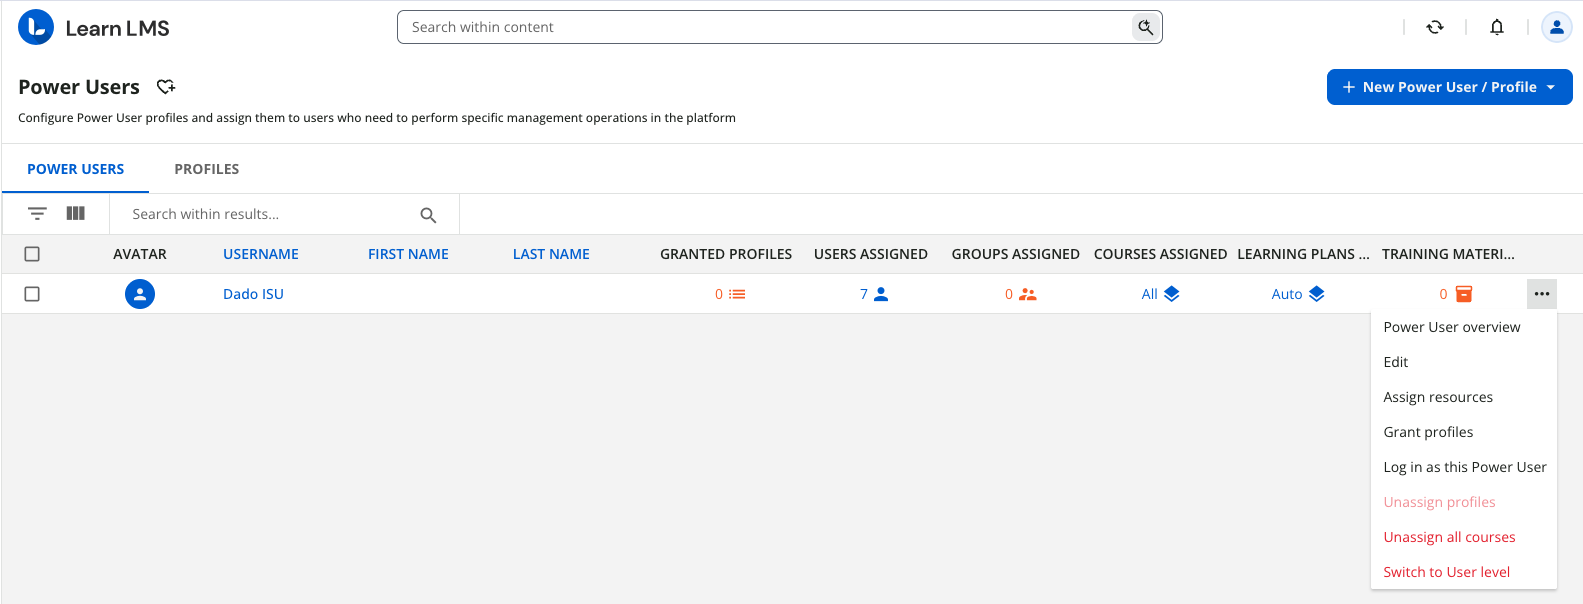
- Click on the Assigned Resources tab, then the Assign Resources button on the top right. Select Users
- At the next step, assign the Dado account either all users in your organization, or just the subsection of users that Dado will need to add to courses. Click Assign.
- Click on the Assign Resources button again and this time select Courses.
- At the next step, assign the Dado account the courses you will want people automatically enrolled into. Click Assign.
Step 2: Create an OAuth2 app in Docebo
- Next navigate to the Add ons and Integrations menu in the left-hand icon bar, and select API via OAuth.
-
Select the API credentials tab in the center, then click Add OAuth2 app
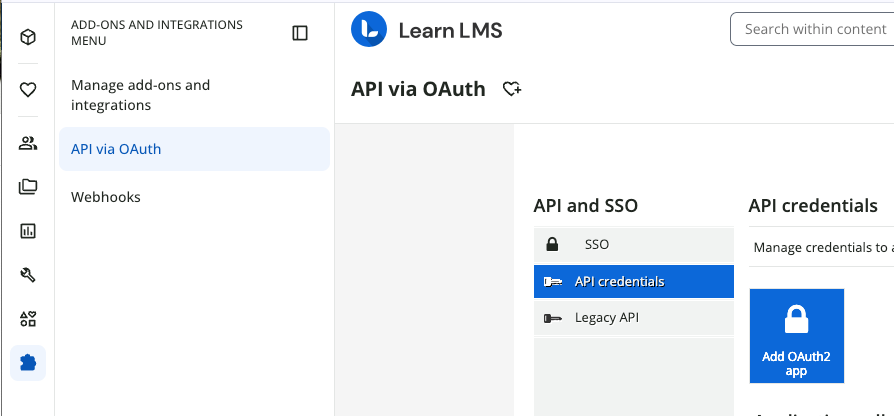
- In the Add OAuth2 app window, input the following details:
- App name: Dado
- App description: A concise explanation of what the app will do (enable Dado to enroll employees in courses)
- Client ID: Dado
- Redirect URL: https://emplexp.cloudfunctions.net/docebo-oauthRedirect
- Make a note of the Client ID and Secret – you will need it for the next step
- Under advanced settings, select the following checkboxes
- Authorization code + implicit grant
- Resource owner password credentials
-
Client credentials
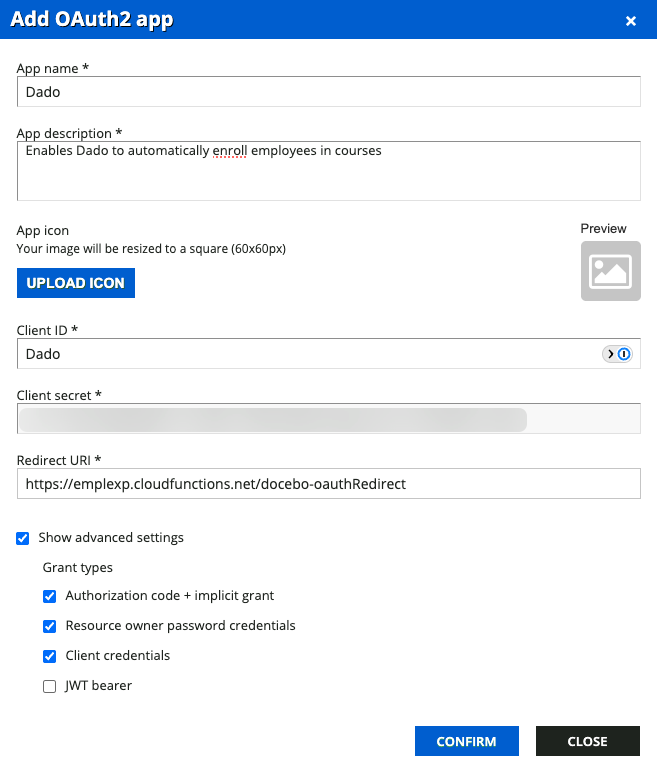
- Click Confirm
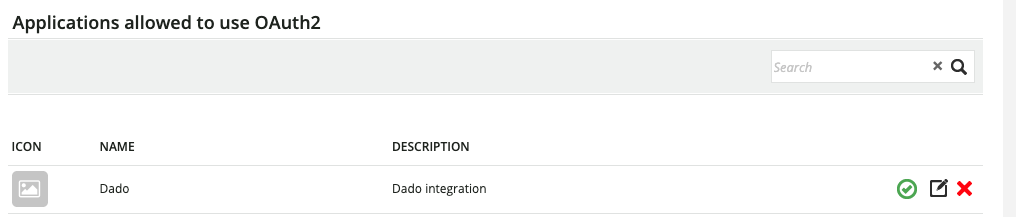
- In the Applications allowed to use OAuth2 table, find the app you've just created and click the grey checkmark icon on the right hand side, to activate the app
-
The app is activated when the icon is green
-
Step 3: Add Docebo credentials to Dado
- Log into your Dado account, and go to Settings > Integrations. Click on the Docebo card.
- Input the following details:
- Authentication method: Username & password (OAuth2)
- Subdomain: the first part of the URL you use to access Docebo, between https:// and .docebosaas.com. For instance, if your Docebo URL is https://acme.docebosaas.com, you'd input acme here
- Client ID: the Client ID from Step 2
- Client Secret: the Client Secret from Step 2
- Username: the username of the account you set up in Step 1
-
Password: the password of the account you set up in Step 1
- Click Set up
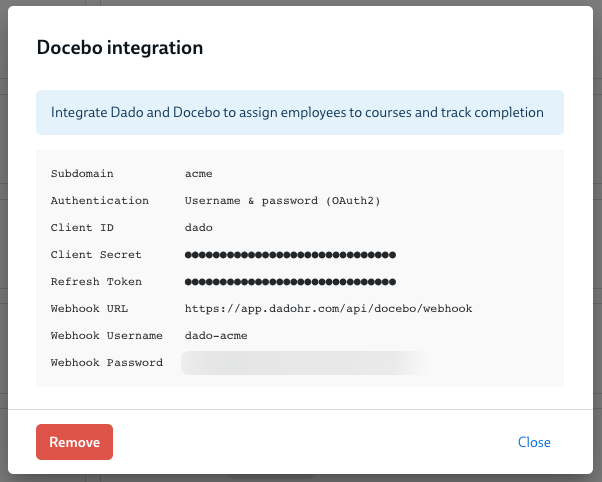
- If you have entered the details correctly, the card will reload with some extra information.
-
Make a note of the Webhook Username and Webhook Password – you'll need them for the next step
-
Step 4: Create a Webhook in Docebo
-
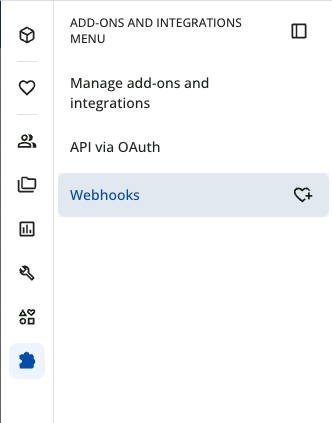
In your Docebo account, return to the Add-ons and Integrations menu and select Webhooks
- Click the Add webhooks button on the right hand side
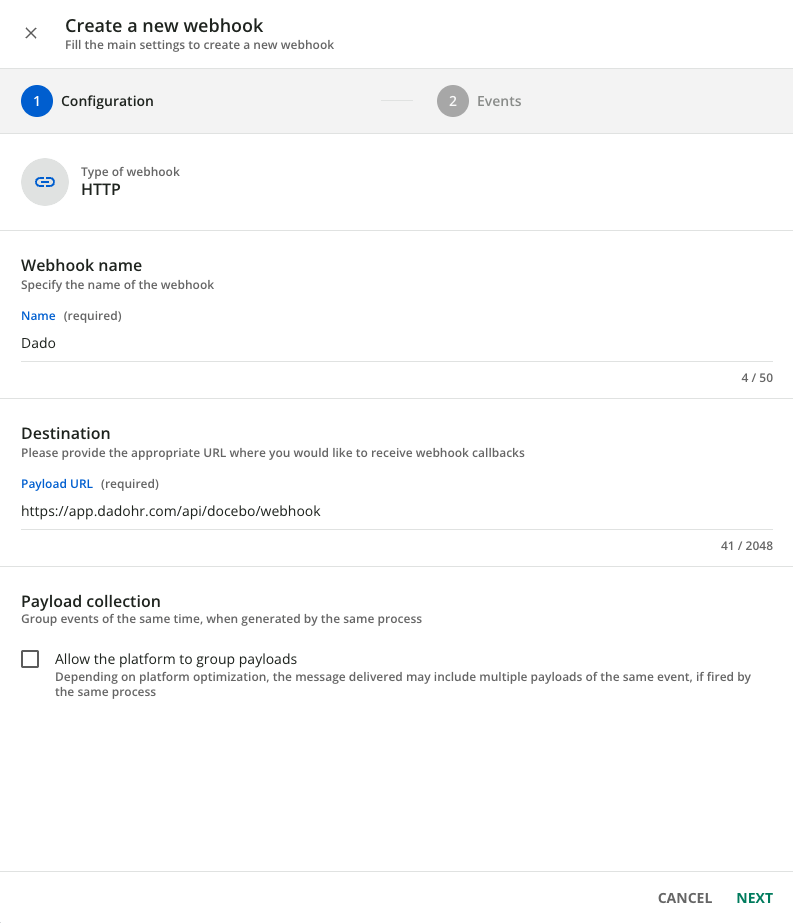
- In the sidebar, input the following:
- Type of webhook: HTTP
- Webhook name: Dado
- Payload URL: https://app.dadohr.com/api/docebo/webhook
-
Leave the Payload Collection box unchecked
- Click Next. On the Events step, select the following events:
- User level has been changed in a course
- Learner completed course
- Learner completed learning plan
- Assignment has been submitted
- Click Create
- In the table showing all your webhooks, find the webhook you've just created and click on the ... menu on the right hand side of the table row. Select Activate.

Now you've completed set up of the Docebo integration, you can set up tasks and automations in your Dado experiences to enroll employees in courses and track completion.