Setting up OneLogin SSO
This article focuses just on setting up OneLogin SSO. For more general information on using SSO with Dado, please see our SSO help article.
Time required: 10 minutes
Pre-requisites: a OneLogin user account with access to the Admin Portal and permissions to add new Applications. This is likely a Super User user, unless you have configured custom permissions in your OneLogin portal.
Step 1: Start the integration set-up in Dado
- Go to Settings > Integrations in your Dado admin account
-
Click on the SAML SSO card and a new window will appear
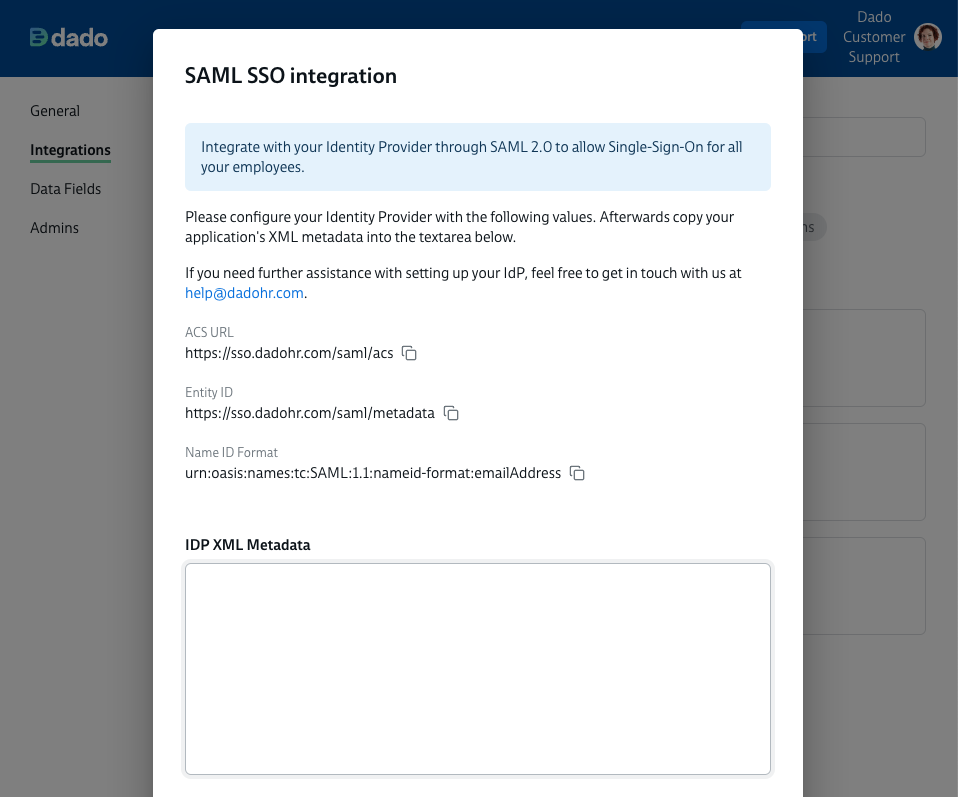
- Make a note of the following information, or keep this window open in a separate tab while you complete step 2.
- ACS URL
- Entity ID
- Name ID Format

Step 2: Setting up the SAML application within OneLogin
- Log into your OneLogin Admin Portal
- Navigate to Applications in the top navigation, and then click Add Application
-
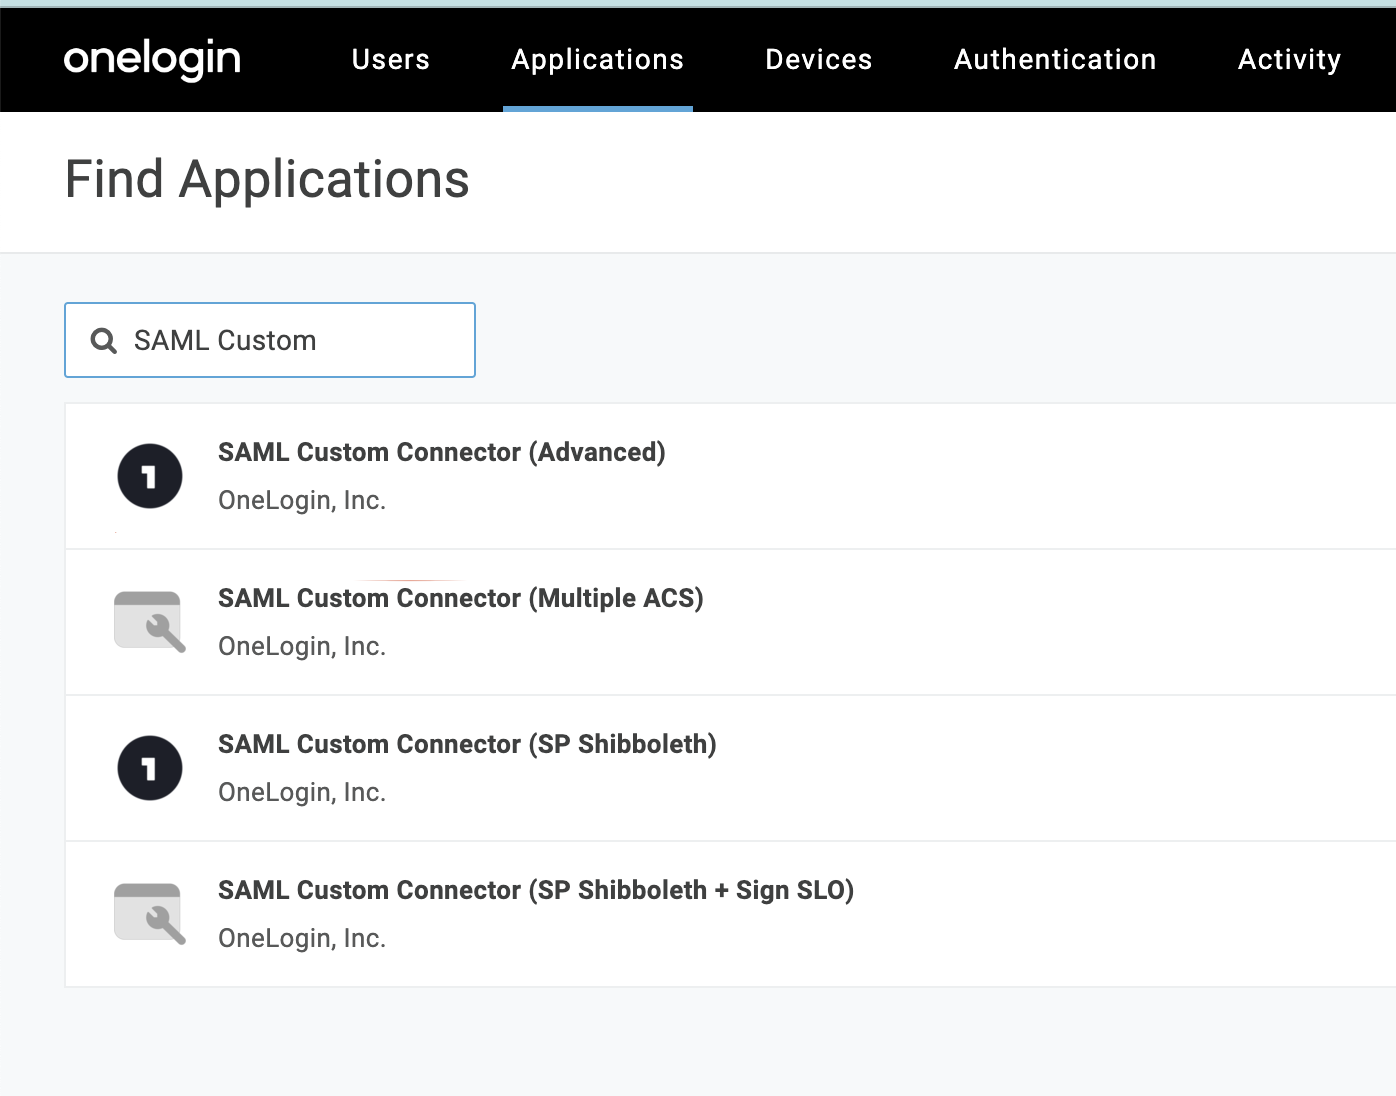
Now search for SAML Custom Connector and click SAML Custom Connector (Advanced)
- In the next screen, input a name and a logo, then click Save in the top right.
- Here are links for a full Dado logo and a Dado icon
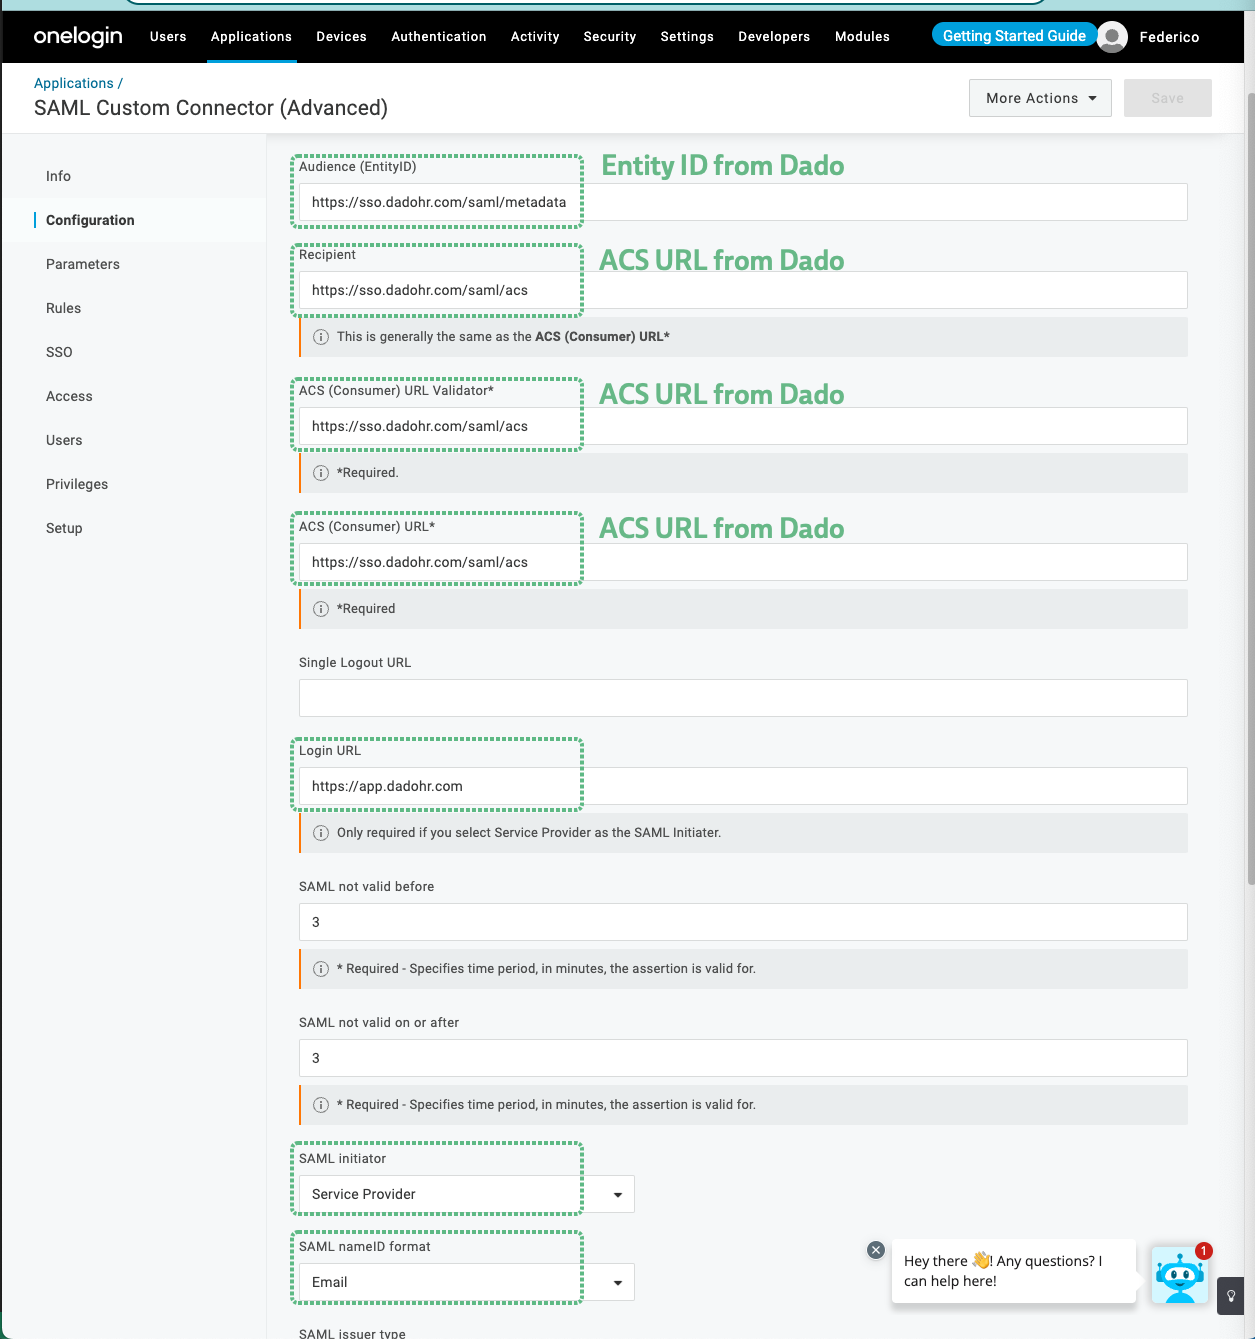
- On the next screen, you will be asked for the configuration information you got from Dado in Step 1.
- Input the Entity ID from Dado into the Audience (EntityID) field
- Input the ACS URL from Dado into the Recipient field, the ACS (Consumer) URL Validator) field and the ACS (Consumer) URL fields
- In the Login URL field, input https://app.dadohr.com
- In the SAML initiator field, select Service Provider
-
In the SAML nameID format field, select Email
- Click Save in the top right
- Click More actions in the top right and select SAML Metadata


- An XML file will download to your computer. You'll need this for the Step 3, below.
- Assign the newly created Dado application to the users who will need to access it via SSO
- Depending on what you set up in Dado in Step 3, you'll either need to assign the app to employees with Dado Admin accounts, or to these people plus any employees assigned tasks via Dado.
- We recommend using OneLogin's Roles feature to do this. Find instructions on how to set up Roles here.
Step 3: Finish your set-up in Dado
- Go to the Dado Admin app, and navigate to Settings > Integrations.
- Click on the SAML SSO card
- Paste the contents of the XML file into the IDP XML Metadata field in the new window, then click Save.
- You'll now be presented with two options: switching on SSO for End Users or Admin Users. For guidance on these two options, please see our general SSO help article.